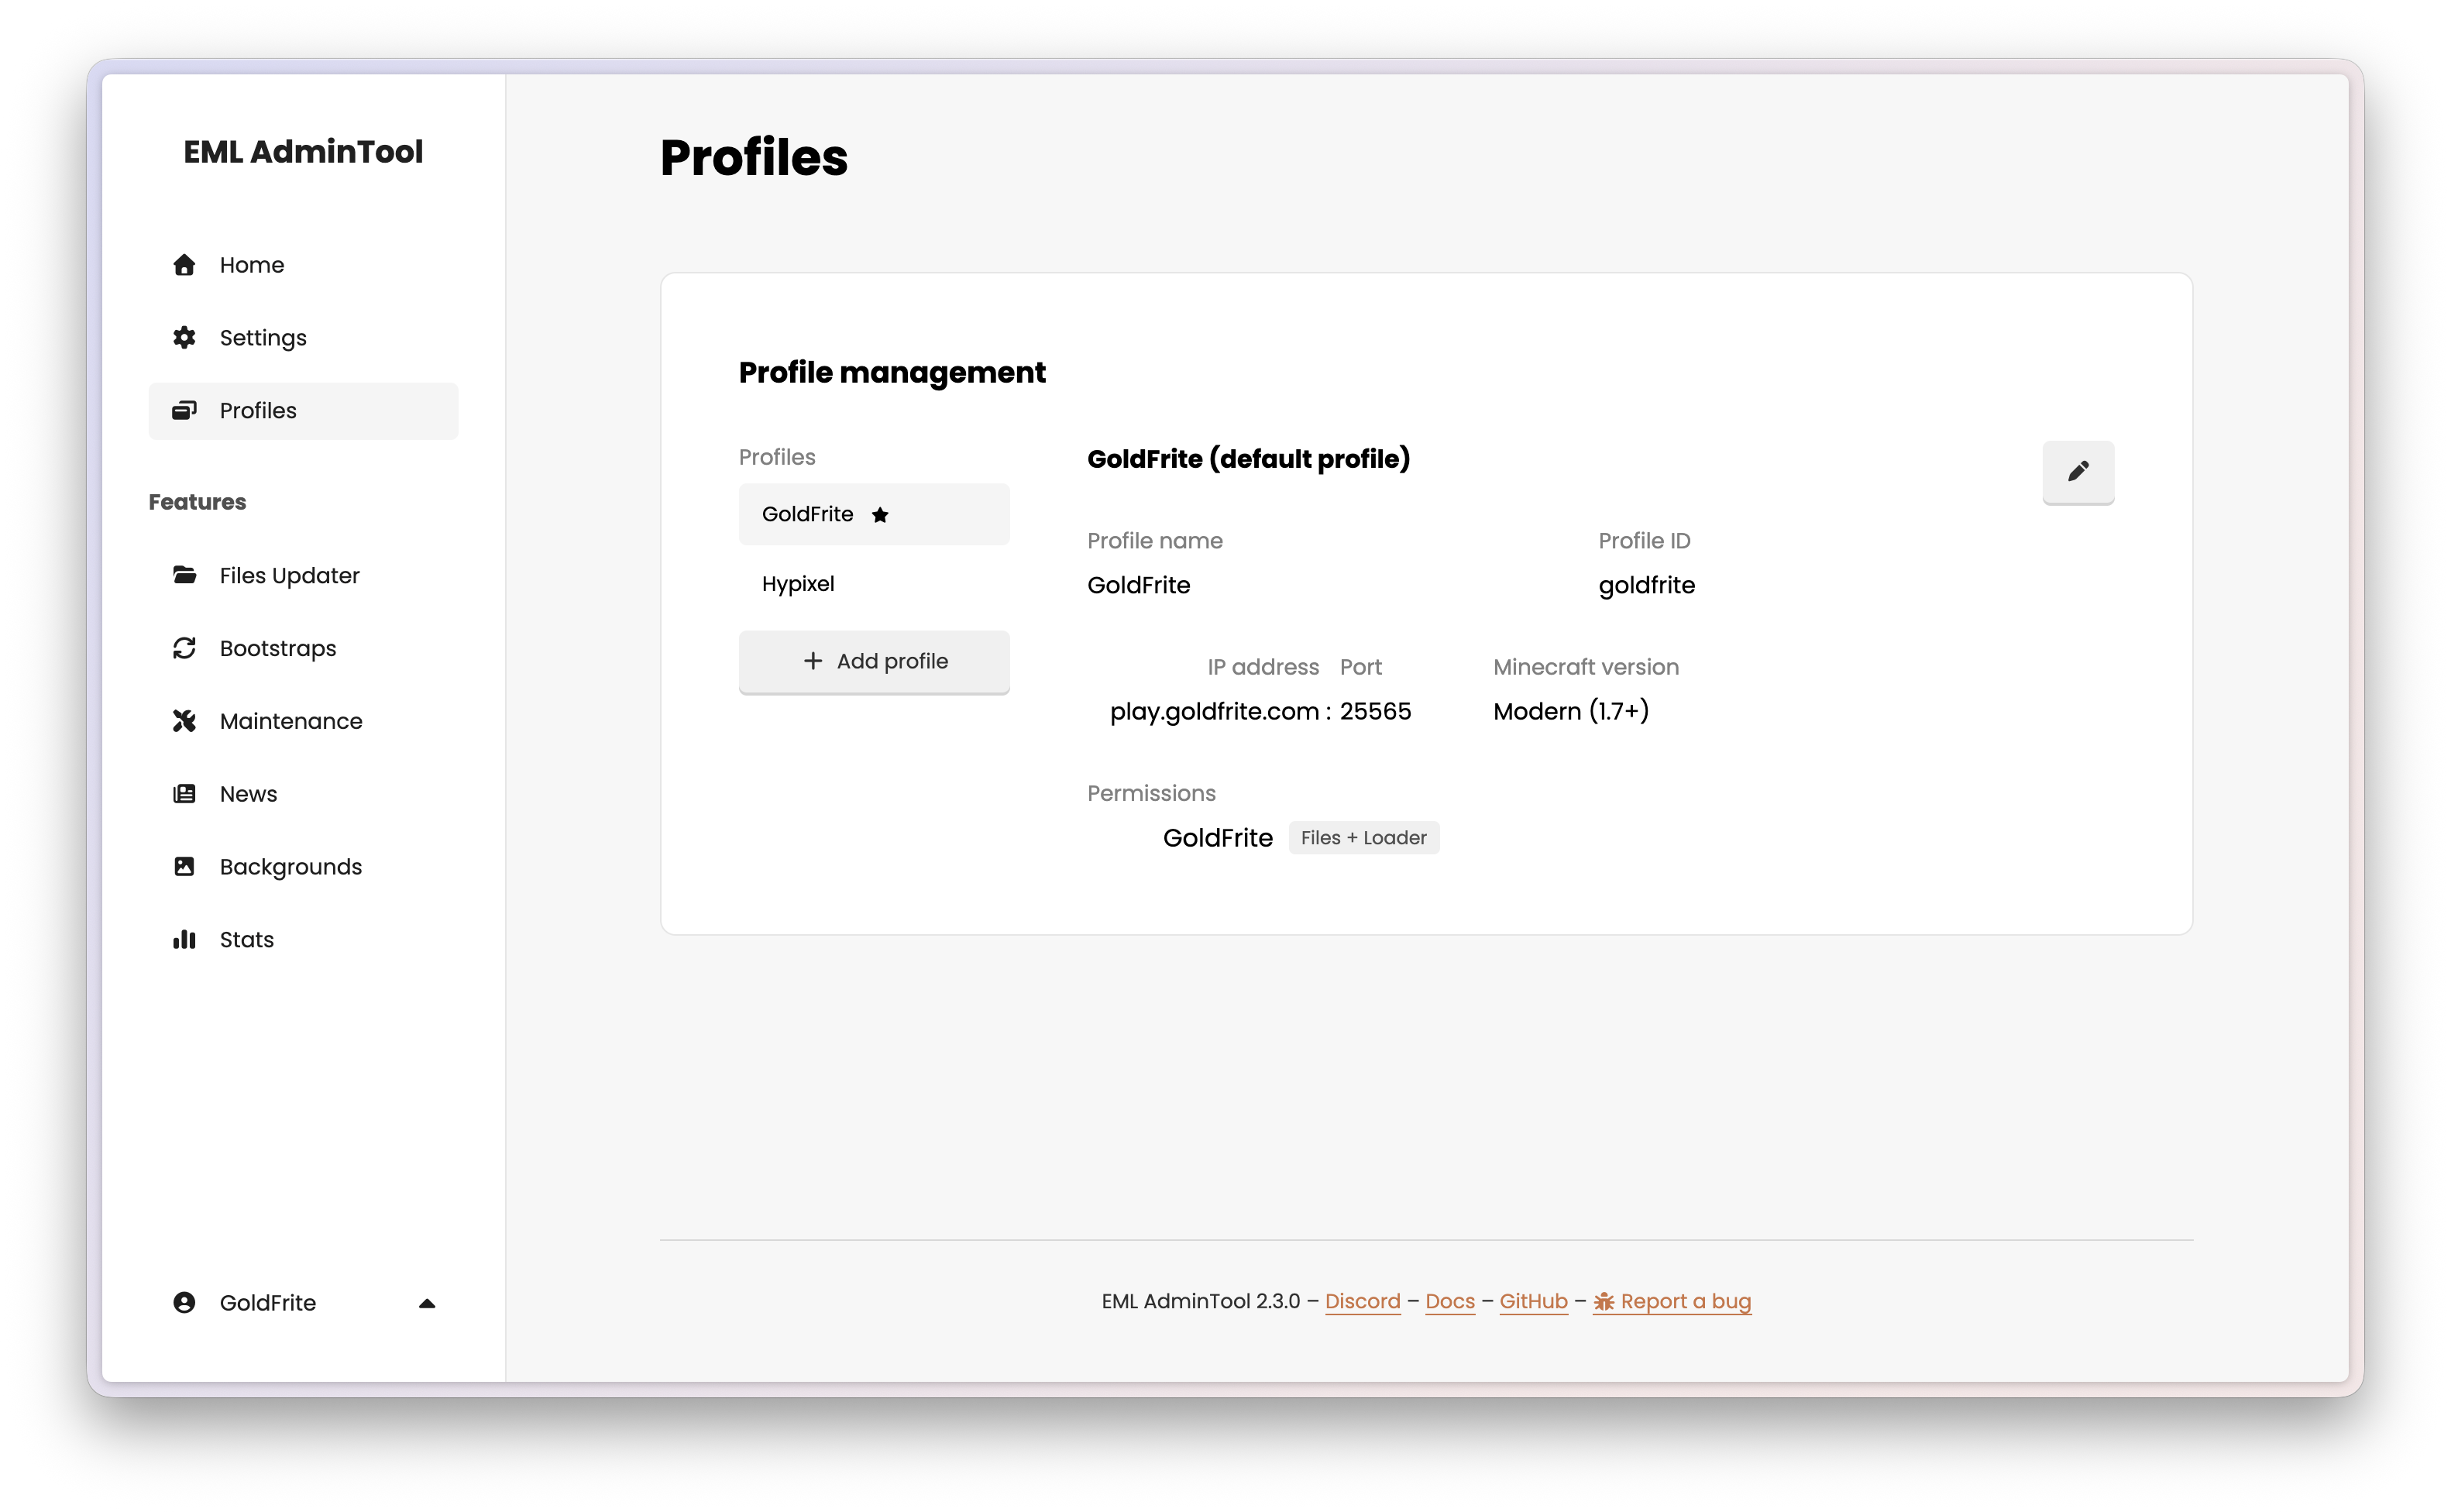
Profile management
Profiles allow you to manage different configurations for your launcher. Each profile has its own files, loader configuration, Minecraft version, and server address — completely isolated from the others.
How it works
Each profile corresponds to a specific configuration of the launcher. When players launch the game, they can choose which profile to use, and the launcher will load the corresponding files and settings.
Managing Profiles
Creating a profile
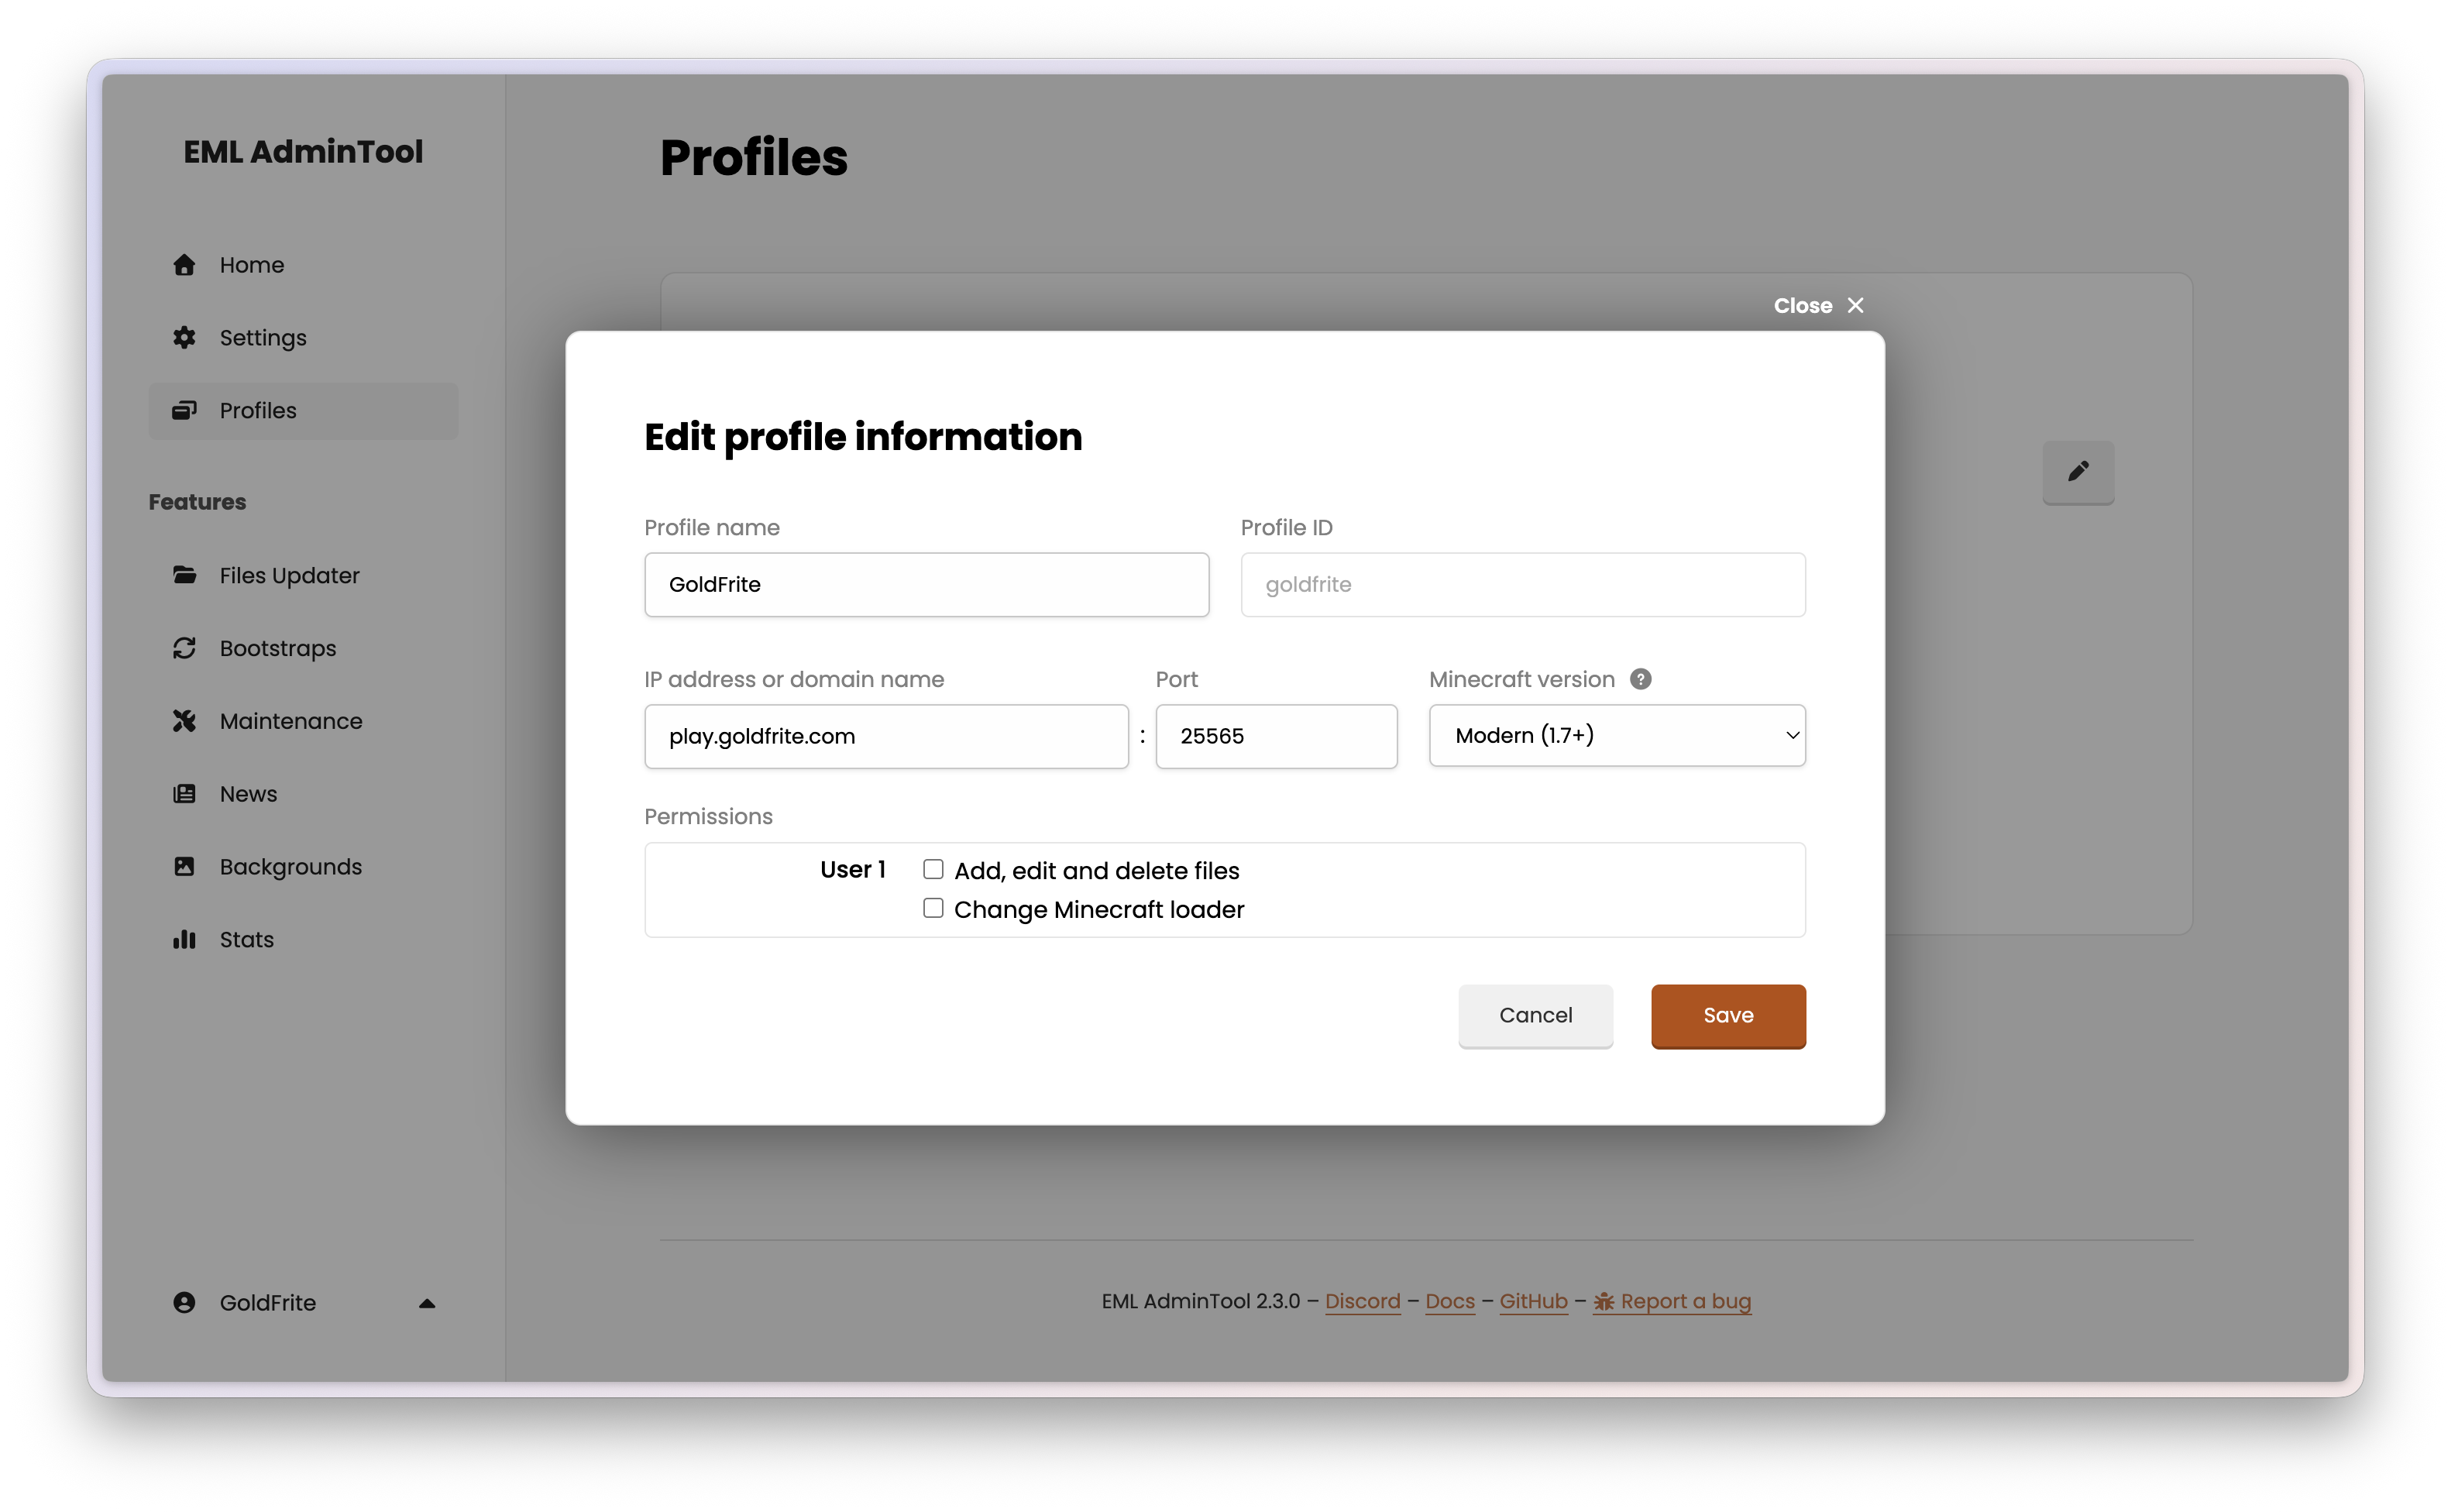
Click the “Add profile” button. A modal opens with the following fields:
Name: The display name for this profile (e.g.
Survival,Modded 1.20).Slug: A unique identifier used internally (e.g.
survival,modded-120). This is auto-generated from the name but can be edited.Server IP: The IP address of the Minecraft server associated with this profile. This is optional and can be left blank if the profile is not tied to a specific server.
Server port: The port of the Minecraft server (default:
25565). This is also optional and can be left blank if not applicable.Minecraft version: The Minecraft version of the server (used for pinging). This is optional and can be left blank if not applicable.
Permissions: Select which users have access to manage this profile (files and/or loader).
Tip
You can also manage user permissions for a profile from the Settings page.
Once saved, the profile appears in the list and is immediately available for file and loader management.
Renaming and editing a profile
Hover over any profile card and click the edit button () to rename it or update its server address. Changes are applied immediately.
Deleting a profile
Hover over a profile card and click the trash button () to delete it.
Caution
Deleting a profile is irreversible. All files associated with that profile will be permanently deleted from the server, and all user permissions tied to it will be removed.
Note
The default profile cannot be deleted.